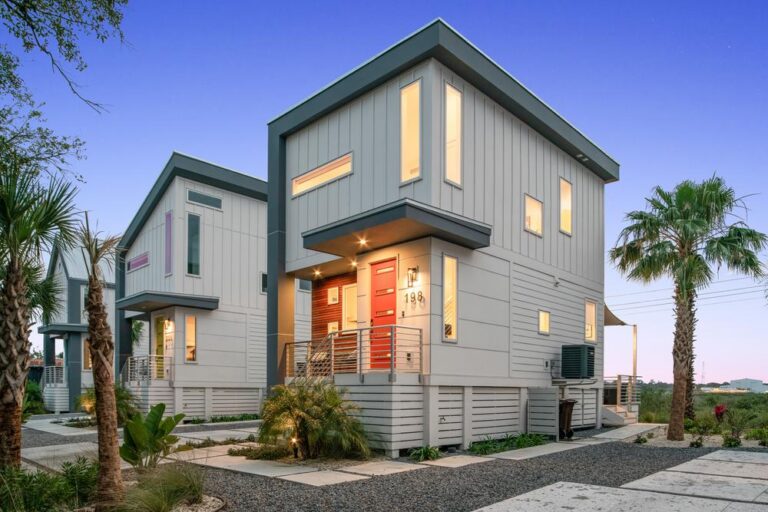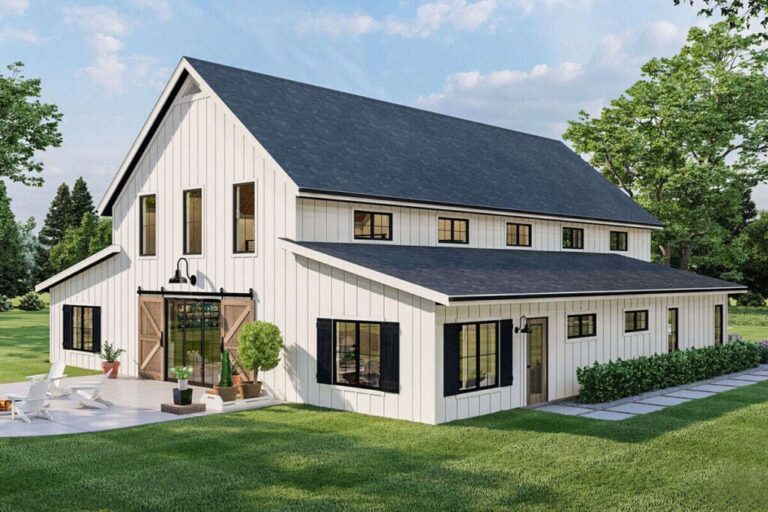
Siding Installation Guide: The Definitive Professional Resource
The external cladding of a residential structure is frequently reduced to an aesthetic consideration, a choice of color or texture that defines curb appeal. However, in the realm of building science, siding represents the primary layer of a complex, multi-functional system known as the building envelope. This envelope must manage competing physical forces: hydrostatic pressure, vapor diffusion, thermal expansion, and ultraviolet degradation. Siding Installation Guide. A failure in any one of these areas does not merely result in a cosmetic blemish; it initiates a trajectory of structural decay that can compromise the very bones of the building.
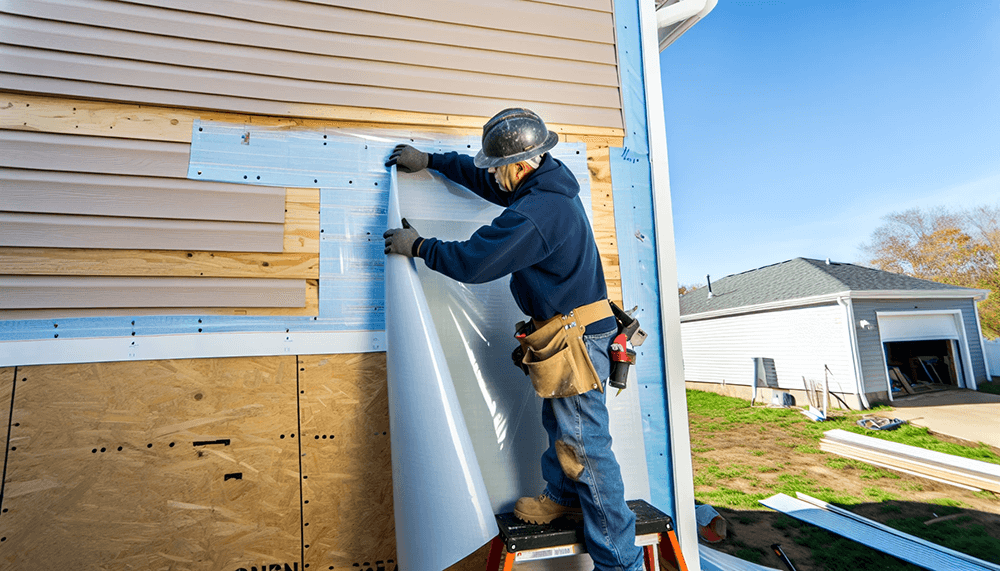
Precision in execution is the differentiator between a facade that lasts twenty years and one that endures for sixty. Modern construction has moved away from the “barrier-wall” philosophy—the idea that a single layer can be perfectly waterproof—toward a “systemic drainage” approach. This acknowledges the inevitability of moisture intrusion and focuses on the controlled evacuation of that moisture. Consequently, the act of installing siding is an exercise in managing the invisible: airflow, dew points, and capillary action.
This discourse moves beyond the superficialities of DIY tutorials to examine the rigorous engineering standards required for high-performance cladding. We will explore the integration of weather-resistive barriers (WRB), the physics of the rainscreen, and the nuanced fastening schedules that allow materials to breathe and move in response to the environment. The objective is to provide a definitive reference for those who prioritize structural longevity and hydrothermal health over temporary visual satisfaction.
Understanding “siding installation guide”
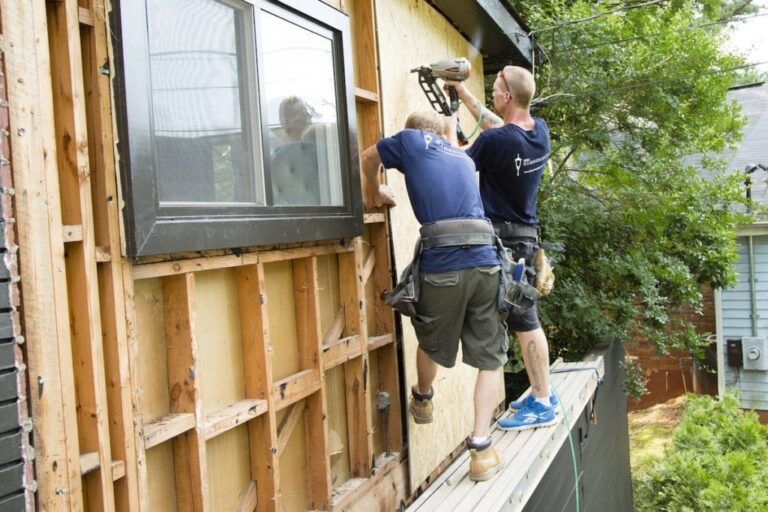
The term siding installation guide is often misinterpreted as a simple sequence of mechanical steps—measure, cut, nail. In a professional editorial context, however, it represents a strategic framework for environmental mitigation. To understand the “guide” is to understand the interplay between the cladding material and the substrate. A primary misunderstanding is the belief that the siding itself is the primary water barrier. In reality, the siding is a “rainscreen” designed to deflect the majority of water, while the true weather barrier remains hidden beneath.
Oversimplification in this field leads to catastrophic outcomes, particularly when installers fail to account for the “coefficient of thermal expansion.” Different materials—vinyl, fiber cement, or thermally modified wood—react to temperature fluctuations with varying degrees of movement. A guide that fails to specify the gap required at a J-channel or the clearance needed at a roof-to-wall intersection is not a guide at all; it is a recipe for buckling, warping, and moisture entrapment.
Furthermore, the “guide” must be adaptable to micro-climates. A fastening schedule that suffices in the arid Southwest would be fundamentally negligent in a coastal high-wind zone where negative pressure can literally suck panels off a wall. Therefore, a definitive installation strategy must prioritize the “transitions”—the points where the siding meets windows, doors, and different material planes—as these are the locations where 90% of all envelope failures originate.
Deep Contextual Background: From Mass Walls to Modern Cavities
Historically, the protection of a home was achieved through mass. Thick stone or timber walls absorbed moisture and slowly released it back into the atmosphere through evaporation. These structures “breathed” because they were thermally inefficient and air-leaky. The introduction of modern insulation and airtight construction changed the physics of the wall. We began trapping moisture inside the assembly, necessitating the development of sacrificial outer layers.
The mid-20th century saw the rise of aluminum and early vinyl siding, marketed as “permanent” solutions. Yet, these early iterations often failed because they were installed as face-sealed barriers. When water inevitably bypassed the seals, it had no path for drainage, leading to the “leaky condo” crises and widespread rot in suburban developments. Today, we have entered the era of the “managed drainage plane.” Modern standards demand that we assume water will get behind the siding and provide a clear, unobstructed path for it to exit via gravity and airflow.
Conceptual Frameworks and Mental Models
To master the installation of siding, one must adopt specific mental models that govern the behavior of the exterior wall.
1. The 4D Water Management Model
Every installation must address four tiers of defense:
-
Deflection: The siding itself, which sheds the vast majority of water.
-
Drainage: The air gap or drainage mat that allows gravity to pull water down and out.
-
Drying: The ventilation that allows air to circulate, evaporating residual moisture.
-
Durability: The use of moisture-tolerant materials (like stainless steel fasteners) at critical junctions.
2. The Hydrostatic Pressure Balance
In high-wind events, air pressure on the outside of the siding is higher than the pressure behind it. This differential “pushes” water into every crack. A high-performance installation creates a “pressure-equalized rainscreen,” where the pressure behind the siding matches the outside, neutralizing the force that drives water inward.
3. The Thermal Bridge Mitigation
The installation is the final opportunity to address thermal bridging. By using furring strips or continuous insulation behind the siding, the installer breaks the conductive path between the exterior cold (or heat) and the wooden studs, significantly increasing the home’s energy efficiency.
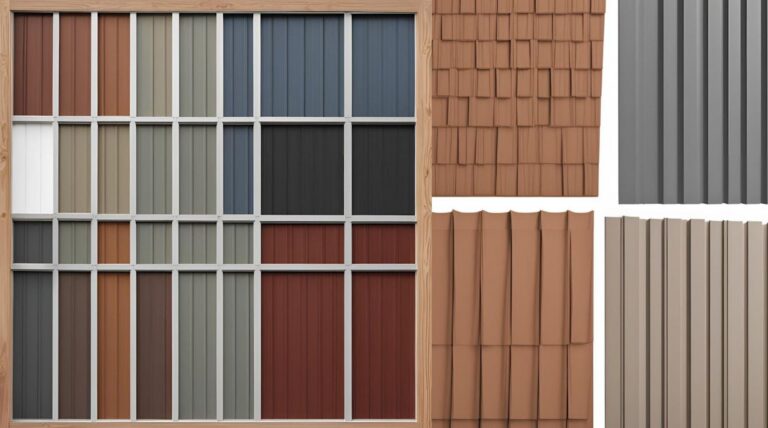
Key Categories and Variations: A Material Comparison
Installation requirements vary drastically by material. The following table highlights the critical trade-offs that influence the installation strategy.
| Material | Primary Advantage | Key Installation Risk | Fastening Logic |
| Fiber Cement | Fire/Rot Resistance | Heavy; brittle if mishandled | Blind-nailed; strictly regulated gaps |
| Engineered Wood | Structural Rigidity | Moisture wicking at cut edges | Requires immediate sealing of all cuts |
| Vinyl (Insulated) | Energy Efficiency | High thermal expansion | Must “hang” on the nail, never pinned |
| Metal (Steel/Alum) | Longevity | Galvanic corrosion | Requires specialized clips/fasteners |
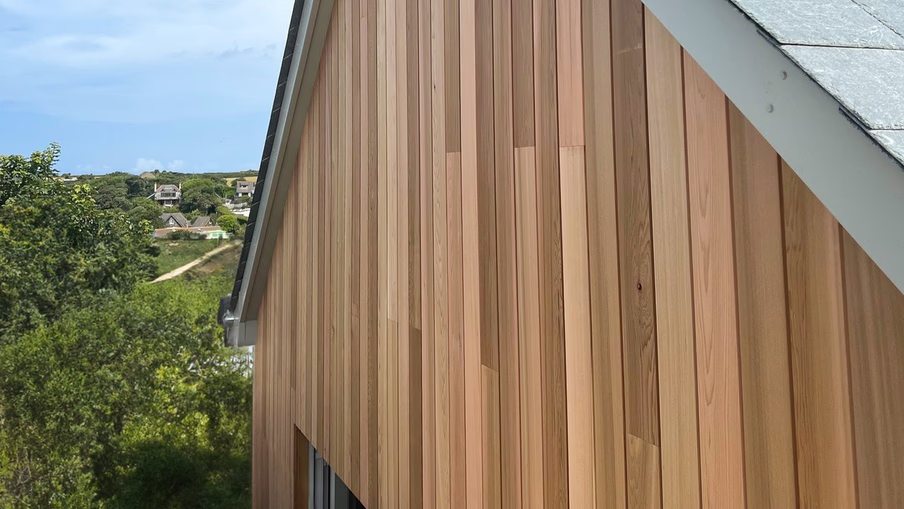
| Natural Cedar | Aesthetics/Permeability | Tannin staining | Stainless steel only to prevent “bleeding” |
| Cellular PVC | Moisture Immunity | High expansion/contraction | Requires “glued and screwed” joints |
Decision Logic for Material Selection
Choosing the right material involves a “constraint-matching” exercise. If the project is in a high-fire-risk zone, fiber cement is the logical choice despite its heavy labor requirement. If the structure has complex, many-angled architecture, a more flexible material like engineered wood may be preferred to avoid the “oil-canning” aesthetic often seen with poorly installed metal panels on uneven walls.
Detailed Real-World Scenarios Siding Installation Guide
Scenario 1: The Coastal Salt-Spray Zone
In coastal South Carolina, the installation must account for both high humidity and corrosive air. Here, standard galvanized fasteners will fail within five years. The strategy requires 304 or 316-grade stainless steel fasteners and a minimum 3/8-inch rainscreen gap to ensure that salt-laden air doesn’t sit stagnant against the WRB.
Scenario 2: The Extreme Northern Freeze-Thaw
In Minnesota, the “solar vapor drive” is a critical risk. When sun hits wet siding, it drives moisture inward. If the siding is installed over a non-permeable barrier, siding installation guide, this vapor condenses on the cold studs. The installation must use a “vapor-open” WRB that allows the wall to dry toward the exterior.
Scenario 3: The Urban Retrofit on Uneven Substrates
Older homes rarely have perfectly flat walls. Installing modern, rigid panels like fiber cement can lead to cracking. The “guide” here involves the use of adjustable furring strips or “shims” to create a perfectly planar surface before the first piece of siding is ever cut.
Planning, Cost, and Resource Dynamics
The economic reality of siding is often obscured by the “cost-per-square-foot” of the material. A true professional analysis includes the total cost of the assembly.
-
Direct Costs: Materials, specialized fasteners, and high-performance flashings.
-
Indirect Costs: Scaffolding, lead-paint containment (on older structures), and the labor time required for intricate detail work around penetrations.
-
Opportunity Cost: Selecting a “cheap” installation method that saves $2,000 today but results in a $20,000 structural repair in fifteen years.
Estimated Investment by System Type
| System Tier | Est. Cost (per 100 sq ft) | Lifespan Expectancy | Labor Complexity |
| Standard Vinyl | $600 – $900 | 15 – 25 Years | Low |
| Premium Fiber Cement | $1,200 – $1,800 | 30 – 50 Years | High |
| Architectural Metal | $2,000 – $3,500 | 50+ Years | Expert |
| Thermally Modified Wood | $1,800 – $3,000 | 40+ Years | Moderate |
Tools, Strategies, and Support Systems
A professional installation is defined by the tools used to ensure accuracy.
-
Laser Levels: Critical for ensuring that the “starter strip” is perfectly horizontal across the entire perimeter.
-
Gecko Gauges: Tools that hold fiber cement boards in place, ensuring a perfectly consistent reveal.
-
Pneumatic Siding Nailers with Depth Control: Prevents “over-driving” fasteners, which can crush the material or prevent necessary thermal movement.
-
Flashing Brakes: Used to custom-bend metal flashings for unique window and door geometries.
-
Cap Staplers: Ensuring the WRB is fastened with caps rather than raw staples, preventing water from wicking through the staple holes.
-
Oscillating Multi-tools: For precise surgical cuts around existing structural penetrations.
Risk Landscape and Failure Modes
The primary risks in siding installation are rarely catastrophic collapses but rather “slow-motion” moisture disasters.
-
Reverse Lapping: When a higher layer of flashing or wrap is tucked behind the layer below it, funneling water into the wall rather than over the siding.
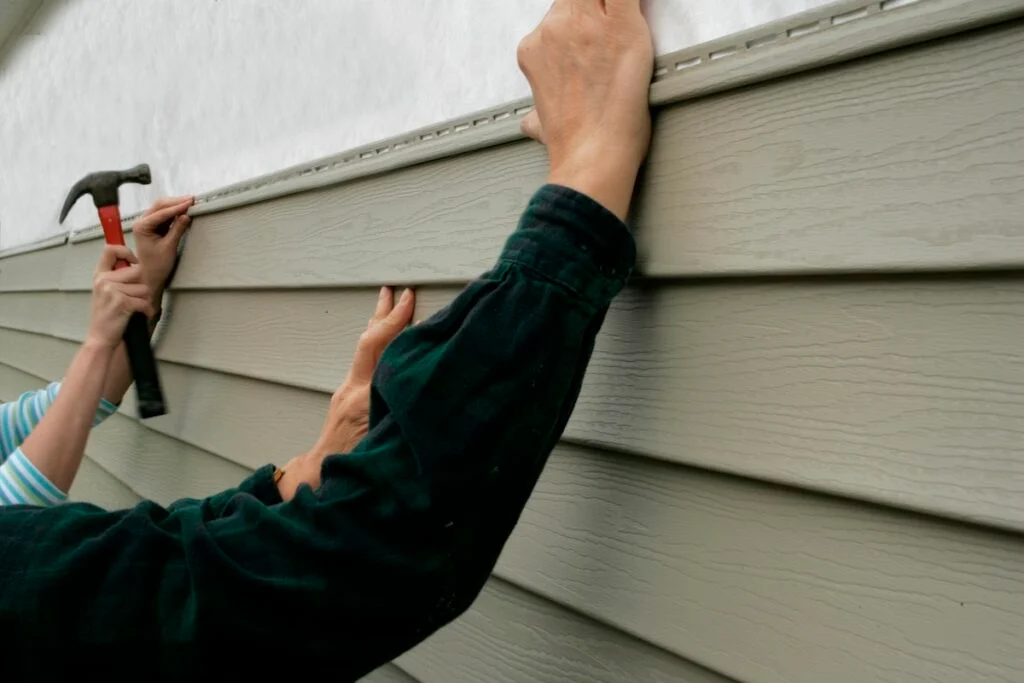
-
Hard-Nailing: Nailing vinyl or PVC siding so tightly that it cannot expand. During a heatwave, this results in permanent buckling.
-
Caulk-Dependency: Relying on caulk to stop water. Caulk is a maintenance item with a short lifespan; the flashing must do the work.
-
Missing Kick-out Flashing: Failing to install a diverter where a roofline meets a vertical wall, which is the #1 cause of rotted wall sheathing.
Governance, Maintenance, and Long-Term Adaptation
An installed exterior is not a “set and forget” asset. It requires a governance schedule to ensure the system continues to perform as designed.
-
Annual Visual Audits: Checking for gaps in the sealant at window corners and ensuring that “weep holes” in the siding or tracks remain unobstructed by dirt or insects.
-
Vegetation Management: Ensuring that shrubs and trees are kept at least 12 inches away from the siding to allow for airflow and to prevent mechanical damage.
-
Sealant Replacement Cycles: Understanding that even high-grade polyurethane sealants typically have a 10-to-15-year life and must be replaced before they lose elasticity.
Measurement, Tracking, and Evaluation
How do we determine if the installation was successful?
-
Leading Indicators: Blower door tests performed before and after installation to measure the air-tightness of the WRB.
-
Lagging Indicators: The absence of “tannin bleed” on wood siding or the lack of efflorescence on stone veneers after the first three seasons.
-
Qualitative Signals: The acoustic performance of the home—does the siding rattle in a 30mph wind? If so, the fastening schedule was likely insufficient.
Common Misconceptions and Oversimplifications
-
Myth: “More nails are better.” Reality: Over-nailing can restrict movement and cause material failure.
-
Myth: “Housewrap is waterproof.” Reality: Housewrap is water-resistant but vapor-permeable. It is designed to shed liquid water while allowing vapor to pass through.
-
Myth: “You don’t need an air gap.” Reality: Without an air gap (rainscreen), moisture is trapped against the WRB through capillary action, leading to degradation.
-
Myth: “Vinyl is maintenance-free.” Reality: Vinyl requires regular cleaning and eventually becomes brittle due to UV exposure, requiring replacement.
Synthesis: The Ethical Responsibility of the Installer
The act of cladding a building carries an inherent ethical responsibility. The installer is responsible for the health of the occupants and the longevity of the structure. By adhering to the principles of building science—prioritizing drainage over sealing and movement over rigidity—we create structures that are not only beautiful but resilient.
The future of siding lies in “adaptive envelopes”—materials that can change their thermal properties or breathability in response to the climate. Until those technologies are mainstream, our best defense is the rigorous application of the “managed drainage” philosophy. A properly executed siding system is a silent engine of durability, siding installation guide, working every day to keep the structural core of the home dry, stable, and efficient.