How to Manage Moisture Behind Siding: A Definitive Building
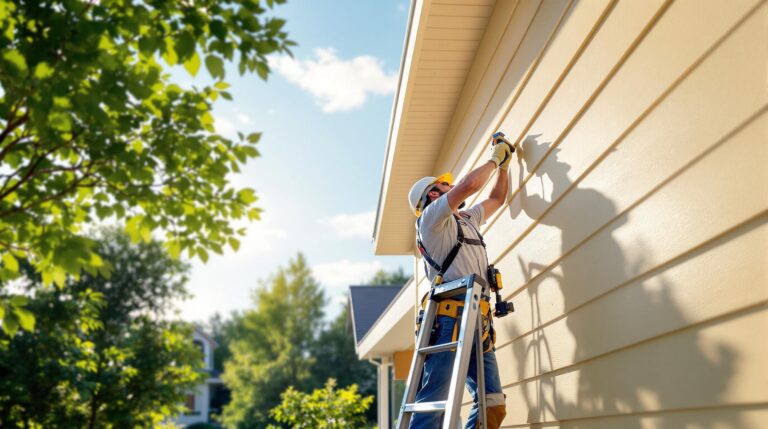
The exterior cladding of a structure is frequently mischaracterized as a static, waterproof shield. In the popular imagination, siding is the equivalent of a raincoat—a singular layer intended to repel every drop of moisture. However, building science reveals a more complex and porous reality. The exterior skin of a home is actually a semi-permeable filter. How to Manage Moisture Behind Siding. Regardless of the material chosen, whether it be premium fiber cement, traditional cedar, or modern polymers, moisture will eventually find its way behind the primary facade. This is not a failure of the material; it is a fundamental law of thermodynamics and fluid mechanics.
The challenge for modern architecture is not the total prevention of moisture ingress, but the sophisticated management of that moisture once it has bypassed the outer layer. When water becomes trapped in the interstitial space between the siding and the structural sheathing, it initiates a silent, destructive trajectory. This “trapped” moisture is the primary catalyst for rot, structural delamination, and the proliferation of microbial colonies that compromise indoor air quality. As homes have become more airtight and highly insulated to meet energy codes, the “drying potential” of wall assemblies has plummeted, making the management of the secondary defense layer more critical than it has ever been in the history of construction.
Managing this hidden hydrology requires an understanding of diverse forces: capillary action, which “sucks” water upward through narrow gaps; wind-driven hydrostatic pressure, which forces liquid through microscopic cracks; and solar vapor drive, which pushes moisture deep into the wall as the sun heats a damp exterior. To address these forces, we must move beyond the surface and analyze the assembly as a holistic system. This editorial investigation serves as a definitive reference for navigating the intersection of hydrothermal physics and structural longevity.
Understanding “how to manage moisture behind siding”
The professional discourse on how to manage moisture behind siding has shifted dramatically from “barrier” mentalities to “drainage” mentalities. A common misunderstanding among homeowners and general contractors is that caulking every joint and sealing every gap is the optimal solution. In reality, over-sealing can be a catastrophic error. When we seal the exit points of a wall assembly, we inadvertently create a “vapor sandwich” where moisture can enter—often through invisible capillary paths—but can never evaporate or drain.
A multi-perspective view of this challenge reveals that moisture management is a game of three-dimensional movement. We must consider liquid water (bulk drainage), water vapor (diffusion), and airflow (ventilation). A system that handles bulk drainage but ignores ventilation will eventually suffer from “ghosting” or condensation on the back of the siding panels. Conversely, a system that is too “open” may allow excessive air infiltration, undermining the thermal performance of the insulation. The “best” plan is one that balances these competing needs based on the specific microclimate of the site.
The risk of oversimplification is particularly high during the selection of Weather-Resistive Barriers (WRBs). Many view all house wraps as identical, but their “perm ratings”—the measure of how much vapor can pass through the material—vary significantly. If a high-perm wrap is used in a climate where it shouldn’t be, or if a low-perm wrap traps interior humidity against a cold exterior sheathing, the result is the same: the slow, expensive degradation of the home’s skeletal integrity. True mastery of this topic involves reconciling the physics of the wall with the practicalities of field installation.
The Historical Evolution of the Managed Wall
For centuries, the primary strategy for moisture management was “mass and breathability.” Early masonry and timber-frame structures relied on thick walls that could absorb a significant amount of water (acting as a “moisture buffer”) and then dry out slowly due to the massive amounts of air leaking through the building. These structures were energy-inefficient, but they were hydrothermal survivors. The walls were so “leaky” that they could dry in both directions—inward and outward.
The mid-20th century introduced the “sealed box” philosophy. As energy costs rose, we began packing wall cavities with insulation and wrapping them in non-permeable materials like polyethylene. This shift effectively killed the wall’s ability to dry. When water inevitably bypassed the siding, it had nowhere to go. This era gave rise to the “leaky condo” crises of the 1980s and 90s, where thousands of buildings suffered from systemic rot because they were designed with “face-sealed” cladding systems that lacked a drainage cavity.
The current era is defined by the “Drained and Back-Ventilated” (DBV) system. We have returned to the wisdom of allowing walls to breathe, but we now do so through engineered cavities known as rainscreens. This evolution represents a sophisticated compromise: we maintain high thermal efficiency through airtight interior barriers while providing a sacrificial, high-performance “drying zone” directly behind the siding.
Conceptual Frameworks and Mental Models
To master the management of moisture, building professionals utilize several core mental models:
1. The 4D Hierarchy of Water Management
-
Deflection: The siding’s job to shed 90% of water.
-
Drainage: The cavity’s job to allow the remaining 10% to exit via gravity.
-
Drying: The ventilation’s job to evaporate residual dampness through airflow.
-
Durability: The use of moisture-tolerant materials (like stainless steel fasteners) at the drainage plane.
2. The Hydrostatic Pressure Equalization
Wind creates a pressure differential that “sucks” water into cracks. By creating a vented gap behind the siding, we allow the air pressure behind the siding to equalize with the air pressure outside. This neutralizes the force that would otherwise drive water into the wall.
3. The Vapor Diffusion Gradient
Moisture moves from areas of high concentration to low concentration. In the summer, solar heat drives vapor inward; in the winter, interior heat drives vapor outward. A successful wall assembly must be “vapor-open” in at least one direction—and ideally both—to ensure that it never reaches a point of total saturation.
Sub-Cladding Variations: Systems and Trade-offs
| System Type | Mechanism | Primary Advantage | Primary Trade-off |
| Traditional House Wrap | Micro-porous membrane | Low cost; easy install | Zero air gap; prone to “surfactant” leaks |
| Drainable WRB | Textured/Crinkled wrap | Low profile; provides some drainage | Minimal airflow; low drying capacity |
| Rainscreen (Furring) | 3/4″ Wood/Plastic strips | Superior drainage & ventilation | Increased wall thickness; higher labor |
| Dimpled Mat | Polyethylene mesh | Consistent gap; vapor break | High material cost; complex transitions |
| Integrated Sheathing | Factory-applied barrier | One-step install; airtight | Relies heavily on high-end tape integrity |
Decision Logic: Matching System to Exposure
The choice of system should follow the “Rainfall-to-Drying Ratio.” In an arid environment (e.g., Arizona), a simple drainable wrap may suffice. However, in a “high-load” environment (e.g., the Pacific Northwest or a coastal zone), a full 3/4″ rainscreen is effectively mandatory. Failing to scale the moisture management system to the environmental load is a leading cause of premature siding failure.
Real-World Scenarios and Environmental Contexts
Scenario 1: The Solar-Driven Vapor Disaster
A dark-colored fiber cement siding is installed over a standard house wrap in a humid, sunny climate. After a rainstorm, the sun hits the siding, turning the absorbed water into vapor. This vapor is driven through the wrap and condenses on the cold, air-conditioned plywood sheathing. Without an air gap to vent that vapor, the plywood stays wet for weeks, leading to “hidden rot.”
Scenario 2: The Capillary “Wick”
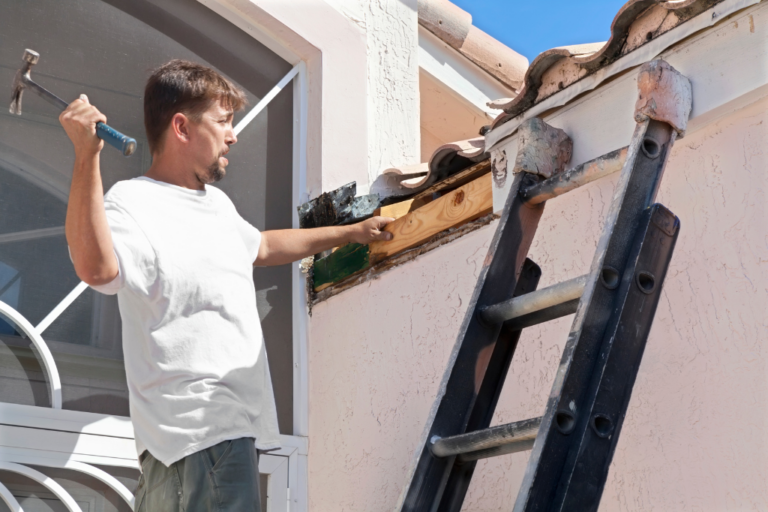
Siding is installed with zero clearance to a roofline or deck. Water sits at the junction and is “sucked” upward behind the siding through capillary action. Without a “kick-out” flashing and a drainage gap, the water is trapped against the bottom plate of the wall, leading to structural base rot that isn’t discovered until the floor begins to sag.
Scenario 3: The High-Performance “Vapor Sandwich”
A retrofit project adds non-permeable rigid foam insulation to the exterior but keeps an interior polyethylene vapor barrier. Moisture that enters the wall through a window leak is now trapped between two “plastic bags.” The wall has zero drying potential in either direction. This is a “failure by design” that only moisture-tracking sensors can catch before it becomes catastrophic.
The Economics of Moisture Management
The financial delta between a “standard” installation and a “high-performance” managed wall is often less than 2% of the total project cost, yet the impact on the building’s valuation is profound.
-
Direct Costs: Furring strips, specialized vent strips (bug screens), and high-performance WRB tapes.
-
Indirect Costs: Reduced warranty claims for the siding manufacturer (many now require a drainage plane for warranty validity).
-
Opportunity Cost: The loss of R-value. Damp insulation can lose up to 50% of its insulative capacity. By keeping the wall cavity dry, you are effectively “paying” for the rainscreen through lower utility bills over the building’s life.
Estimated Cost Comparison (Per 1,000 sq. ft.)
| Component | Standard Wrap Plan | Full Rainscreen Plan |
| Membrane/Wrap | $400 | $800 (High-Perm) |
| Labor (Detailing) | $600 | $1,500 |
| Hardware/Vents | $50 | $400 |
| Total Premium | $0 (Baseline) | $1,650 |
Tools, Strategies, and Implementation Systems
To effectively execute a plan for how to manage moisture behind siding, certain tools and strategies are non-negotiable:
-
Kick-out Flashings: Small, inexpensive metal diverters at roof-wall intersections that prevent 90% of “corner rot” cases.
-
Corrugated Furring: Using plastic furring strips that have vertical and horizontal channels, allowing for cross-ventilation.
-
Self-Adhered (Peel-and-Stick) WRBs: These eliminate the “staple-hole” problem of traditional wraps, creating a seamless air and water barrier.
-
Bug Screens (Starter Strips): Perforated closures at the top and bottom of the rainscreen cavity that allow air in but keep pests out.
-
Stainless Steel Fasteners: In a rainscreen system, the fasteners are exposed to more airflow and potential dampness; stainless steel prevents “bleeding” and corrosion.
-
Low-Expansion Foam & High-Flex Tape: Specifically for window-to-wall transitions, ensuring that the “secondary defense” is truly airtight.
-
Siding Pressure Equalization: Using “vented” siding profiles or specialized clips that allow the cavity to breathe without relying solely on the furring.
The Risk Landscape: A Taxonomy of Failure
Managing moisture is a game of risk-layering. Failure usually occurs when multiple “minor” errors compound:
-
Mechanical Failure: A cracked siding panel or a failed caulk joint (The Entry Point).
-
Hydrostatic Failure: Wind pressure driving water through the crack (The Force).
-
Systemic Failure: A reverse-lapped house wrap or a missing window flashing (The Path).
-
Hydrothermal Failure: A lack of air gap preventing drying (The Trap).
The most dangerous failure is the “Secondary Defense Breach.” If the WRB is punctured or improperly integrated with window flashings, water enters the stud cavity. At this point, the siding becomes irrelevant; the structural health of the building is officially compromised.
Governance, Maintenance, and Review Cycles
A managed wall requires a “lifecycle stewardship” approach rather than a “fix and forget” mentality.
-
The Annual Audit: Inspecting the bottom “weep holes” of the siding and the rainscreen vents. If these are clogged by mulch, dirt, or insect nests, the drying potential of the wall drops to zero.
-
Sealant Monitoring: Most sealants have a 7–10 year lifespan. A governance cycle should include a professional “caulk audit” to ensure that the primary deflection layer is still doing its job.
-
Adjustment Triggers: If interior humidity levels remain high or if “musty” smells are detected near exterior walls, it serves as a trigger for a non-invasive moisture probe test behind the siding.
Measurement, Tracking, and Evaluation
How do we prove the wall is staying dry?
-
Leading Indicators: Inspecting the “lapping” of the WRB during construction. Water must always flow over the layer below it.
-
Lagging Indicators: Using an infrared (IR) camera during the winter. Cold spots on the exterior wall often indicate damp insulation that is transferring heat.
-
Quantitative Signal: Embedded moisture sensors in the sheathing (common in high-end “passive house” builds) that provide real-time data on the %MC (Moisture Content). Anything consistently above 19% is a signal for immediate intervention.
-
Qualitative Signal: The absence of “tannin bleed” (on wood) or “efflorescence” (on masonry), both of which indicate excessive moisture movement through the material.
Common Misconceptions and Industry Myths
-
Myth: “Vinyl is maintenance-free.” Reality: Vinyl is a “leaky” material by design. It relies entirely on the WRB behind it. If the wrap is poorly installed, vinyl can be the most dangerous siding because it hides rot until the wall is soft.
-
Myth: “Caulk is the primary water barrier.” Reality: Caulk is a 5-year aesthetic fix. The flashing and the drainage plane are the 50-year structural fixes.
-
Myth: “You don’t need a rainscreen in dry climates.” Reality: Even in deserts, rainscreens provide a “thermal break” that reduces the cooling load on the house by venting heat before it reaches the sheathing.
-
Myth: “House wrap is waterproof.” Reality: Most wraps are “water-resistant.” If water sits against them without a drainage gap (due to “lapping” or pressure), they will eventually leak through.
-
Myth: “More insulation is always better.” Reality: More insulation reduces the “heat flux” through the wall, which means the wall stays colder for longer and dries out slower. High insulation requires better moisture management.
Ethical and Practical Considerations
There is an ethical dimension to building science: the “Durable Housing” mandate. Building a structure that rots in 20 years is a massive waste of carbon, capital, and resources. By investing in the “invisible architecture” of moisture management, we are practicing true sustainability.
Practically, the industry is moving toward “Integrated Barriers”—sheathing that comes with the WRB factory-applied. While this reduces labor error, it increases the “Point of Failure” risk at the seams. The ethical choice for the builder is to prioritize the assembly over the brand, ensuring that the transition between materials remains the primary focus of the quality control process.
Synthesis: The Future of Adaptive Enclosures
The mastery of how to manage moisture behind siding is a journey from seeing the wall as a boundary to seeing it as a respiratory system. As we face more extreme weather patterns—heavier rain events and more intense heat—the traditional “barrier” wall is increasingly obsolete.
The future lies in “Smart” enclosures: walls that can sense moisture and perhaps even “active” rainscreens that can use small fans to increase ventilation when sensors detect a certain threshold of dampness. Until then, the most resilient strategy remains the disciplined application of the rainscreen principle. A wall that can dry is a wall that can survive. The goal is a building that doesn’t just withstand the elements, but works with the laws of physics to ensure a dry, healthy, and permanent sanctuary.