How to Avoid Siding Mistakes: The Definitive Building Science
The integrity of a building’s exterior is frequently compromised not by the failure of the materials themselves, but by a breakdown in the systemic logic of their application. Siding serves as the outermost layer of a complex assembly known as the building envelope, a boundary that must manage fluid dynamics, thermal transfer, and structural movement simultaneously. How to Avoid Siding Mistakes. When this boundary fails, the consequences are rarely localized; moisture intrusion at a window corner can lead to structural rot at the foundation sill, often remaining undetected for years.
The prevailing challenge in modern construction is the gap between material innovation and installation literacy. Manufacturers continue to develop high-performance composites and engineered woods designed to last half a century, yet these products are often integrated using methods better suited for 19th-century clapboards. This friction between old habits and new technologies is the primary breeding ground for systemic errors. Mastery of the exterior skin requires an appreciation for the physics of the wall—understanding how air pressure, capillary action, and vapor drive interact with the chosen substrate.
Addressing these issues requires a departure from the “checklist” mentality often found in amateur home improvement resources. A comprehensive strategy must account for the specific microclimate of the site, the unique geometry of the architecture, and the chemical compatibility of various sealants and membranes. Only by adopting a rigorous, analytical approach to the building envelope can one ensure that the aesthetic finish does not become a mask for underlying structural decay.
Understanding “how to reduce siding mistakes”
To effectively grasp how to avoid siding mistakes, one must first discard the notion that siding is a standalone product. In the professional sphere, siding is viewed as a “screen” within a multi-layered defense system. The most common misunderstandings arise from the belief that the siding’s primary job is to be waterproof. In reality, most siding systems are designed to be “water-shedding,” acknowledging that some moisture will inevitably bypass the outer layer. The mistake is not the presence of water, but the absence of a path for that water to escape.
Oversimplification risks are rampant in the planning phase. Homeowners and even some general contractors often focus on the “per-square” cost of the material while ignoring the “edge cases”—the intersections where the siding meets different materials. For example, the transition from a horizontal lap siding to a stone water table requires specific Z-flashing and an air gap. Neglecting this detail is a systemic error, regardless of how well the rest of the boards are nailed.
Understanding the complexity of prevention involves:
-
The Interface Problem: Recognizing that failures almost always occur at penetrations (windows, vents, outlets) rather than in the field of the wall.
-
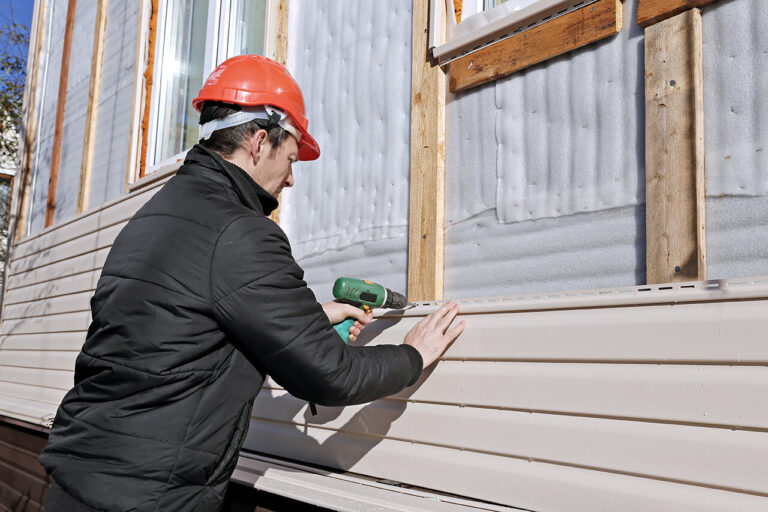
Expansion/Contraction Coefficients: Accounting for the fact that a 12-foot vinyl or PVC board can move significantly with temperature changes, requiring “floating” fastening techniques.
-
Vapor Management: Differentiating between liquid water (rain) and water vapor (humidity), as stopping one can sometimes inadvertently trap the other.
Historical Context and the Evolution of Wall Assemblies
Historically, “mistakes” were mitigated by the sheer breathability of old-growth timber and uninsulated wall cavities. A 1920s bungalow could sustain a minor leak for decades because the drafty walls allowed the wood to dry out before rot could take hold. The introduction of fiberglass insulation and plywood sheathing in the mid-20th century changed the thermal profile of the home, effectively “trapping” moisture that previously would have evaporated.
The 1980s and 90s saw a spike in catastrophic failures, most notably with the early versions of EIFS (Exterior Insulation and Finish Systems) and certain hardboard products. These failures were a watershed moment for building science, proving that making a building “too tight” without providing a drainage plane was a recipe for structural disaster. Modern professional standards have evolved from these lessons, moving toward the “Rainscreen” model, which explicitly separates the siding from the weather-resistive barrier (WRB) to ensure a drying gap.
Conceptual Frameworks: The Physics of Prevention
Professional installers utilize several mental models to navigate the complexity of the building envelope.
1. The Red Line Test
This model focuses on the continuity of the air and water barriers. If you cannot trace a continuous line of protection around every floor plan and section drawing without lifting your pen, the system has a hole. This is used primarily during the design phase to identify “thermal bridges” or “moisture gaps” at floor joists and roof-to-wall intersections.
2. The Shingle-Lap Logic
Everything in a wall assembly must be layered like a deck of cards. The higher layer must always overlap the lower layer. While this sounds elementary, it is frequently violated at window sills and header flashings, where installers might tuck a flashing membrane behind a lower piece of house wrap, creating a “funnel” that directs water into the sheathing.
3. The Hydrostatic Pressure Differential
Wind creates a pressure difference that can literally “suck” water upward or through tiny nail holes. To combat this, professionals use “pressure-equalized rainscreens,” where the air gap behind the siding allows the pressure on both sides of the panel to equalize, neutralizing the force that drives water inward.
Material Dynamics and Site-Specific Trade-offs
Choosing the right material is a primary step in preventing long-term failure, as certain materials are fundamentally incompatible with specific environments.
| Material | Primary Failure Mode | Expansion Rate | Best Mitigation Strategy |
| Vinyl | Buckling/Oil-canning | High | Do not “hard-nail”; center nails in slots. |
| Fiber Cement | De-lamination at edges | Low | Maintain 2″ clearance from roofs; seal all cuts. |
| Engineered Wood | Edge-swelling/Mushrooms | Moderate | Strict adherence to gap requirements at joints. |
| Natural Cedar | Rot and Cupping | Moderate | Back-prime all six sides before installation. |
| Metal/Aluminum | Denting and Corrosion | High | Use stainless fasteners; avoid salt-spray contact. |
Decision Logic: The “Compatibility Matrix”
When planning, the logic should prioritize the substrate’s reaction to the local climate. For example, fiber cement is excellent for fire resistance in arid climates but requires extreme diligence in high-moisture “splash zones” where snow piles against the wall. Conversely, cellular PVC is impervious to moisture but can distort in high-heat, direct-sun applications if painted in dark colors.
Real-World Failure Scenarios and Second-Order Effects How to Avoid Siding Mistakes
Scenario 1: The “Blind” Window Leak
An installer fails to use a “sill pan” under a high-end window. The water enters at the corner, bypasses the siding, and runs down the inside of the wall.
-
Second-order effect: The homeowners don’t see the leak, but the increased humidity inside the wall cavity causes the interior drywall screws to rust and the paint to bubble, which they mistake for a plumbing issue.
Scenario 2: Over-driven Fasteners in Fiber Cement
To speed up the job, a crew sets their pneumatic nail guns too high. The nail heads “blow through” the top layer of the material.
-
Second-order effect: During a wind storm, the siding panels lack the structural “head” to hold them to the wall. Entire sections of siding blow off, exposing the house wrap to UV rays, which degrades the wrap’s waterproofing in weeks.
Scenario 3: Missing Kick-out Flashing
A roof-to-wall intersection lacks a diverter (kick-out) flashing.
-
Second-order effect: The concentrated volume of water from the roof is funneled behind the siding of the lower floor. This saturates the rim joist, leading to a structural floor failure that costs $30,000 to repair, all to save a $15 piece of flashing.
Fiscal Dynamics: The Hidden Costs of Error
The financial burden of a siding mistake is rarely limited to the cost of the replacement board.
| Cost Element | Direct Impact | Indirect/Long-term Impact |
| Material Waste | 5-10% of budget | Disposal fees for spoiled material. |
| Remediation Labor | 2x original labor | Demolition of bad work is slower than new install. |
| Structural Repair | $5,000 – $50,000+ | Mold remediation and potential structural shoring. |
| Warranty Voiding | Full replacement cost | Manufacturers will not honor claims on “improperly installed” goods. |
The Variability of Labor Rates:
In many markets, the “lowest bid” is a leading indicator of future failure. High-quality installers build “insurance” into their bids in the form of extra time for meticulous flashing and higher-grade tapes. Reducing costs by 20% on labor often increases the risk of a 200% repair cost later.
Tools and Strategies for Precision Integration
To avoid systemic errors, a specific set of tools and “soft” strategies must be employed:
-
Pneumatic Depth Gauges: Ensures nails are flush, not over-driven or under-driven.
-
Z-Flashing and Drip Edges: Mechanical barriers used at all horizontal transitions.
-
Back-priming: Coating the rear of wood or fiber cement to prevent “cupping” caused by uneven moisture absorption.
-
Shim Systems: Using plastic or wood shims to ensure the wall is perfectly flat; “wavy” walls create gaps where insects and moisture can congregate.
-
Tape Rollers: Using a J-roller on flashing tapes to ensure the adhesive actually bonds to the sheathing (pressure-sensitive adhesive requires pressure).
-
Thermal Imaging: Post-installation scans can detect “cold spots” that indicate moisture intrusion or missing insulation.
The Risk Landscape: A Taxonomy of Compounding Failures
Failures are rarely solitary events; they are typically “cascading.”
-
Chemical Incompatibility: Using a silicone-based caulk on a material that requires an asphalitic-based adhesive can lead to “bond failure.” The caulk peels away in six months, allowing water to enter.
-
UV Degradation: Leaving house wrap exposed for too long before the siding is applied. Most wraps are rated for 30-120 days of UV. If a project is delayed, the wrap becomes brittle and loses its “perm” rating.
-
Fastener Corrosion: Using galvanized nails with ACQ-treated (pressure treated) lumber. The chemicals in the wood eat the galvanization, the nails rust through, and the siding eventually falls off the wall.
Long-Term Governance and Adaptive Maintenance
A “set it and forget it” mentality is a fundamental mistake. Governance of the building envelope requires a schedule.
The Tiered Maintenance Checklist
-
Quarterly: Inspect “splash zones” near the ground. Ensure mulch or soil is at least 6 inches below the siding edge.
-
Annually: Check all “sealant joints” (caulk). Caulk is a “sacrificial” material; it is designed to fail so your siding doesn’t. Expect to replace it every 5–7 years.
-
Post-Storm: Check for “unzipping” in vinyl or “chipping” in fiber cement.
-
5-Year Audit: Hire a professional to inspect the “kick-out” flashings and gutter intersections, which are the most common failure points.
Measurement and Evaluation Metrics
How do you evaluate if you have succeeded in avoiding siding mistakes?
Qualitative Signals:
-
The “Drum” Test: Lightly tapping on the siding. It should feel solid and uniform. “Rattles” indicate loose fasteners; “mushiness” indicates soft sheathing (rot) behind the panel.
-
Sightlines: Standing at one corner and looking down the wall. If there are “waves,” the studs were not shimmed or the fasteners are too tight.
Quantitative Signals:
-
Moisture Meter Readings: Probing the sheathing through a vent or outlet to ensure the moisture content is below 15%.
-
Energy Performance: Monitoring cooling costs. If bills spike, it may indicate that moisture has saturated the insulation, destroying its R-value.
Common Misconceptions and Industry Myths
Myth 1: “House wrap is a waterproof barrier.”
Correction: It is a weather-resistive barrier. It is designed to shed liquid water while remaining breathable. If you treat it like plastic wrap, you will trap moisture inside the house.
Myth 2: “Caulk can fix a flashing error.”
Correction: Caulk is a secondary defense. If the flashing is not layered correctly, caulk will only delay the leak by a few months.
Myth 3: “Fiber cement is maintenance-free.”
Correction: It is a “low maintenance” product, but it still requires paint. The “raw” edges are highly absorbent and must be kept sealed.
Myth 4: “You should nail siding as tight as possible.”
Correction: Almost all siding needs to “breathe” or move. Hard-nailing leads to buckling, cracking, and pulled fasteners.
Myth 5: “Vinyl is a vapor barrier.”
Correction: Vinyl is one of the most “leaky” sidings by design. It allows air to circulate behind it, which is actually a benefit for drying out the wall.
Conclusion
Mastering the exterior envelope is an exercise in intellectual honesty. It requires acknowledging that water is a persistent force that cannot be entirely excluded, only managed. The process of how to avoid siding mistakes is essentially the process of respecting building science over convenience. It involves a commitment to detail at the intersections, a refusal to cut corners on the “hidden” membranes, and a long-term view of the structure’s health. While the upfront investment in high-quality tapes, flashings, and labor may seem high, it is a fraction of the cost required to remediate a systemic failure. In the end, a successful siding project is one that remains invisible—performing its protective duties for decades without the need for emergency intervention or structural repair.